How to build a CubeSat from mission idea to balloon flight.
You can build a working CubeSat with an Arduino, a handful of sensors, a radio and a 3D-printed frame. Here are the ten steps we follow with students in Hexstar workshops, and what to watch out for at each one.
Before you start
A CubeSat is a system: every part has to fit, share power and talk to the others. Decide three things first, because they drive every other choice.
- Mission: what do you want to measure or show? Temperature and pressure with height, motion, position, or images?
- Range: will it stay in a classroom, go to a rooftop, or fly under a balloon to the stratosphere?
- Team: how much electronics and coding experience do the builders have, and how much time?
You will need a computer with the free Arduino IDE, a USB cable, basic hand tools, and access to a 3D printer if you print the frame.
The 10 steps to build a CubeSat
- Write the mission statement.One or two sentences: “Measure air temperature and pressure from the ground to 30 km and send them live to our ground station.” Every later decision should serve this.
- Fix the size and mass budget.A 1U CubeSat is about 10 × 10 × 10 cm. List every part with its size, weight and power draw, so you know it will fit and the battery will last.
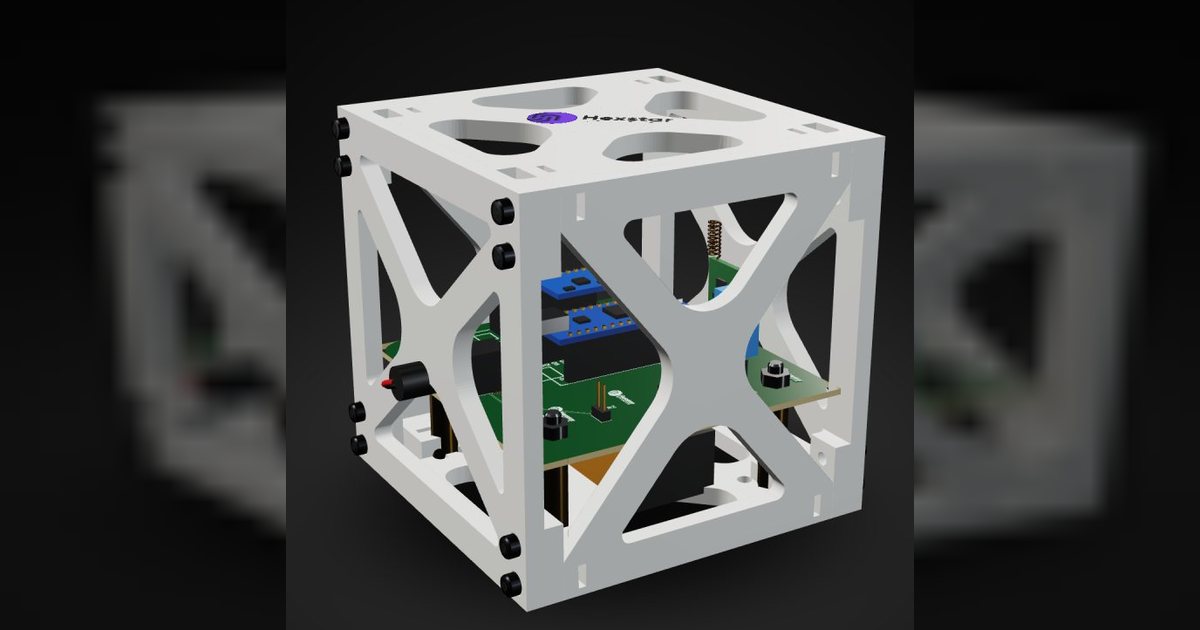
- Build the structure.3D-print a 1U frame (PLA or PETG works for ground and balloon use) or use rails and panels. Plan where the boards, battery and antenna sit, and how you will open it.
- Choose the flight computer.An Arduino Nano is the easiest start and programs over USB. For more memory, speed and data logging, step up to an ARM board such as a SAMD21.
- Add sensors.A BMP280 gives pressure, altitude and temperature; an MPU9250 or similar IMU gives motion and orientation; a GPS module such as the NEO-6M gives position and speed. Plug-in headers make them easy to test one by one.
- Add the radio.A simple 433 MHz module works over short distances. For balloon flights use LoRa (for example a Ra-02 or SX1262), which reaches many kilometres at low power. Check your country’s rules for licence-free radio bands before transmitting.
- Design the power system.A 9 V battery is fine for a classroom model; flight builds use a protected Li-ion cell (such as an 18650) with a regulator. Add a Remove Before Flight switch so the satellite stays off until launch.
- Write the code.Read each sensor, pack the readings into a short telemetry packet with a counter and timestamp, send it every second, and log it locally if you can. Keep packets small so they get through at long range.
- Build the ground station.A second Arduino with the same radio, connected to a laptop by USB, receives the packets. A dashboard plots them live and saves them for analysis.
- Integrate, test and fly.Assemble everything in the frame, run the tests below, then fly it: first on a rooftop or field, then, if your team is ready, under a high-altitude balloon.
Testing before flight
- Desk test: run for the full expected mission time on battery and check nothing resets.
- Range test: walk away with the CubeSat until packets drop, so you know your real radio range.
- Cold test: the stratosphere can reach −50 °C. Test in a freezer and keep the battery insulated.
- Drop and vibration: shake it and drop it onto a soft surface; check that connectors and the battery stay in place.
- GPS lock: confirm the GPS gets a fix outdoors and that its position appears on the ground station.
Build from scratch, or start with a kit?
Building from scratch teaches the most, but sourcing parts, designing the frame and debugging the radio can take weeks. A kit gives you parts that are already proven to work together, so you can spend the time on the mission itself.
| Kit | Best for | Inside | Radio and tracking | Price |
|---|---|---|---|---|
| Hexstar Gen 1In stock | School classes, first builds, ages about 12+ | Arduino Nano, plug-in sensor modules, 9 V battery, 3D-printed 1U frame. No soldering. | 433 MHz telemetry to a USB ground station and live dashboard | ₹3,999 + GST in India $179 outside India |
| Hexstar Gen 2In stock | Senior school, college clubs, balloon flights | Arduino Nano, MPU9250 9-axis IMU, BMP280, ADXL335, temperature and humidity, Remove Before Flight switch | Long-range LoRa (Ra-02) plus NEO-6M GPS for live position and recovery | ₹8,999 + GST in India $299 outside India |
| Hexstar Gen 3 (1U)Pre-order | Universities, labs, advanced makers | Three stacked flight-style boards (EPS, OBC, LoRa) on a 40-pin bus, SAMD21 Cortex-M0+, 18650 cell, microSD logging | 868 MHz LoRa up to +22 dBm, GNSS (GPS + BeiDou), pocket USB ground station | From ₹25,000 + GST |
All Hexstar kits use standard parts and Arduino-compatible code, so students can still modify every subsystem after the first build.
Frequently asked questions
How do I make my own CubeSat?
Define a mission, build a 10 cm 1U frame, add a flight computer such as an Arduino Nano, sensors, a radio and a battery with a Remove Before Flight switch, write code to send telemetry, build a ground station to receive it, then test and fly.
How long does it take to build a CubeSat kit?
A Hexstar Gen 1 kit can be assembled and running in one class period. A scratch-built CubeSat usually takes several weeks of design, sourcing and testing.
What is the best microcontroller for a CubeSat?
For beginners, an Arduino Nano is easiest because it uses the free Arduino IDE. For more speed, memory and logging, a 32-bit ARM board such as the SAMD21 used in the Hexstar 1U is a good next step.
What radio should a CubeSat use?
Short-range classroom builds can use a 433 MHz module. For balloon flights use LoRa, which reaches many kilometres at low power. Always check local rules for licence-free radio bands.
How high can a CubeSat kit fly?
Under a high-altitude weather balloon, a CubeSat payload can reach roughly 30 km into the stratosphere before the balloon bursts and it descends by parachute.
Start your mission
Gen 1 and Gen 2 are in stock and ship from Kolkata to India and worldwide. Gen 3, our flagship 1U CubeSat with three stacked flight boards, is open for pre-order. Schools and bulk orders get a custom quote.